How often do photographers get clients who call up and ask to just do a few shots? Quick and cheap. Often times photographers will feel the pressure to work and justify unreasonably fast shot times to get the assignment; set up the camera and a few lights if any and then onto our screens will magically pop a finished image. Even I fall into this trap in spite of the fact I am a lifelong learner and expert in this business. Yet over and over again I find that great shots take time, they take time and patience to find just that right angle and lighting approach. Try to rush them and you are sure to end up with sub-par results in line with the plethora of new “photographers” work out there. But how do you get to that perfect composition and why does it take time? I decided to put into writing a mostly fluid and intuitive process as best I could. These 5 metrics only skim the surface of the complexities of a great image but they are a great primer to building a great composition, to help you become a more informed client or better photographer!
Without getting into esthetic, narrative requirements and lighting here is a primary list of compositional considerations when setting an interior or exterior shot.
First is the ideal rough angle for the client’s requirements layered upon how that angle plays into the larger narrative of the story. This would be which side of the room or building, to begin with. We often get caught shooting through the entry door of a bedroom for example, but look around there may be another less obvious yet more dynamic shot hidden in the room. So that rough angle which may be at first obvious might not be correct, or at least ideal. When I say ideal I mean the angle that allows the space to really have punch. Finding that angle requires you to step back and walk the space, looking from each side and considering the pros and cons to each angle. It may also be that a room requires two angles not just one.
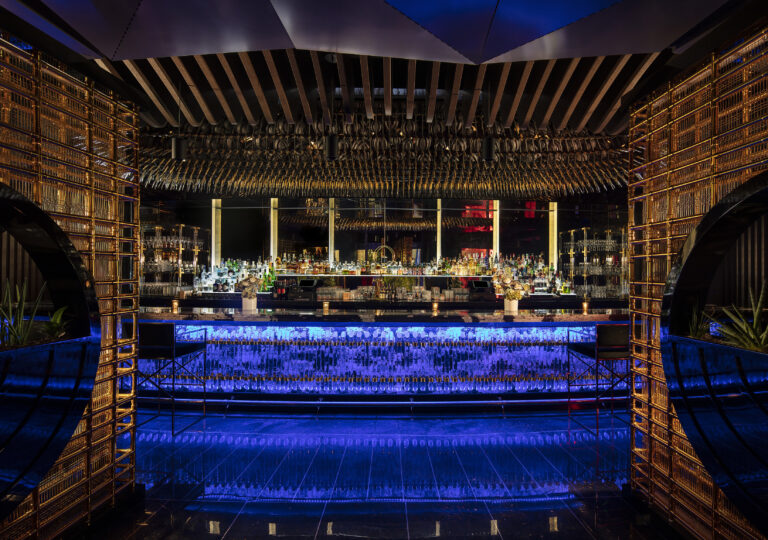
Secondly, we have the camera height. Although each space is unique, generally speaking, set your camera too high and the viewer flies over the space, too low and your viewer will be looking at the space as if they were a toddler. The height has to be set at a position that allows the space to be approachable as if the viewer were there. (Find a shot too high and just the right height.)
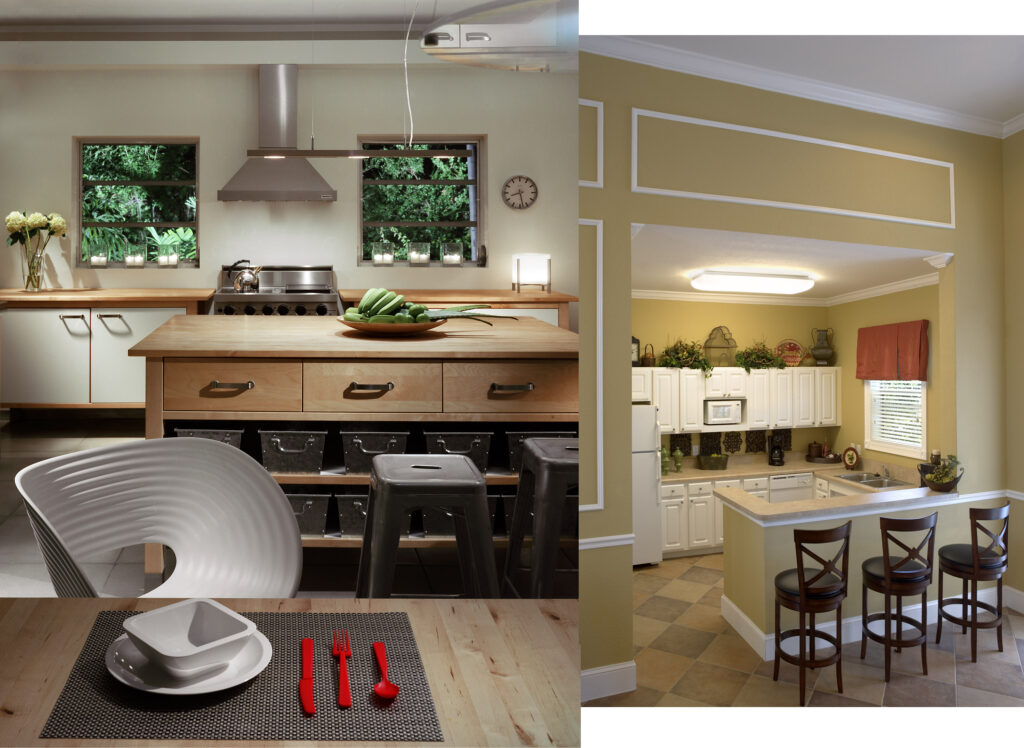
Here is a perfect example of two images, left image intimate and approachable height and the one right image too far away and too high leading to a less intimate feeling. You can see right away I was trying to create something special taking my time with the left image and speeding through without much thought on the right.
Then there are lateral movements which can change the overlap and intention of the shot, both how the shot “moves” and terminates. This actually is a very critical component to the zoning in on the best angle. If your shot terminates into a blank wall or major objects overlap as to obfuscate the silhouette of each then a great shot becomes only good or maybe even fair.
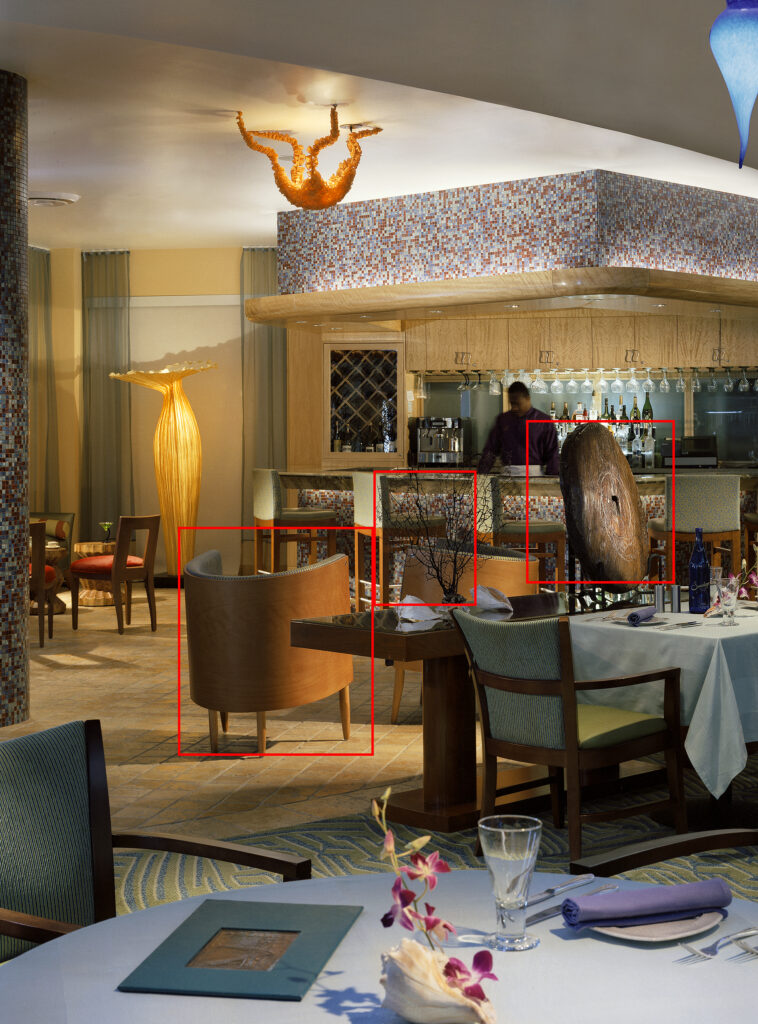
Here is an image pull from a 2004 shoot for Marriott Marco Island where I had a really nice shot but let the center of the shot get cluttered and confusing. I should have in retrospect removed some of those objects. Had I simply moved the coral and round wood item the shot would have been in portfolio instead of being an example of what not to do.
Finally, there are the longitudinal movements, the back forth along with the corresponding lens selection. These two moves normally go hand in hand. Generally speaking, rooms look best when shot with the longest lens you can squeeze into a room. This is the reason we architectural photographers are often smashed up against the wall! You move away from the room and then “zoom” in with the lens. This might be one of the biggest mistakes by a new interior photographer, by getting too wide and too close. This leads to distortion and the dreaded runway effect where a foreground table wall or ceiling becomes 80% of the shot. Avoid this at all costs. It is key to manipulate this last bit of composition with precision.
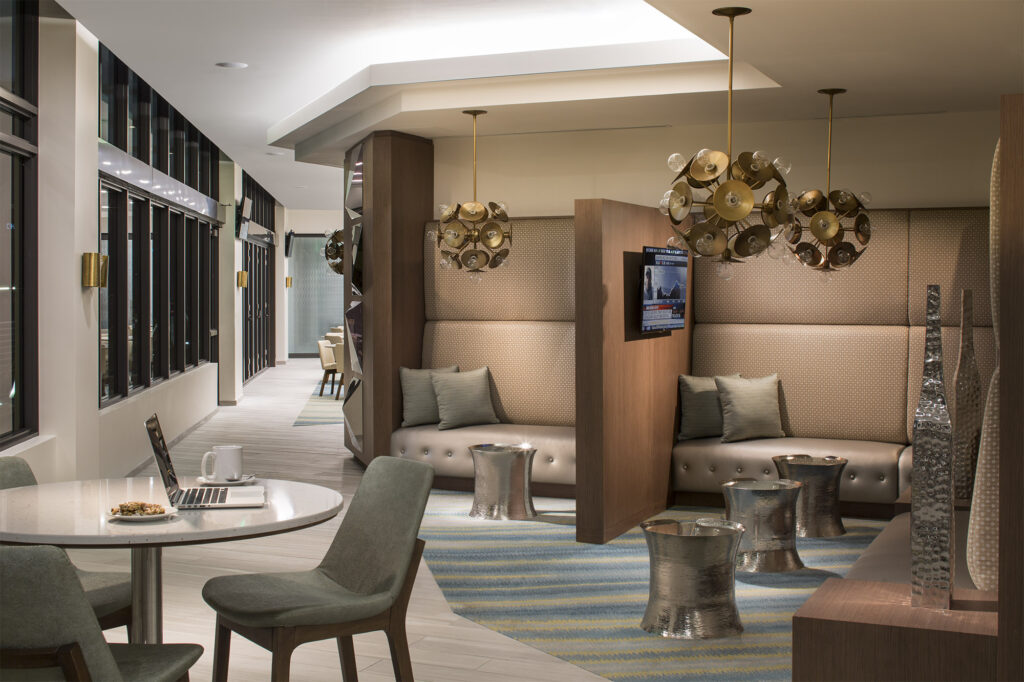
This image photographed for the Marriott Residence Inn South Beach is a prime example of using a “long” lens 45mm TS in an interior shot to achieve a compact and cozy feeling. Photographed with the go-to 24mm ts and the space would have looked loose and un-appealing. The use of the longer lens allows you to bring more movement and product into an image.
So there are roughly 5 rules for iterating an interior shot. This iteration process takes time, not all day, but expect about 15 – 30 minutes of close deliberation for a complex shot and 5 – 10 for more simple shots. Obviously, if you are just beginning your career in photography those times may be far longer. For many photographers, they have already completed a shot in the 20 minutes it should take to carefully consider simply the angle. I have found when I myself am shooting at breakneck speeds without the required time to meditate on the image I am generally unhappy with the outcome. The takeaway is that even in today’s faster passed digital world, great interior shots take time. They take consideration and they take budget, but that is a post for another time!